
Discord Bot & Logins
Staff can log in to the txAdmin web panel and open the in-game /tx menu using their Discord roles, without separate txAdmin accounts.
Before you start
- Open port 40120 so the web panel can be reached.
- To copy IDs in Discord, enable Developer Mode (Settings → Advanced), then right-click a server or role and choose Copy ID.
1. Create the bot
- Go to the Discord Developer Portal and click New Application.
- Open the Bot tab and click Reset Token. Copy the token. You'll need it in step 5.
DANGER
Never share the bot token. Anyone with it controls your bot.
2. Turn on the intents
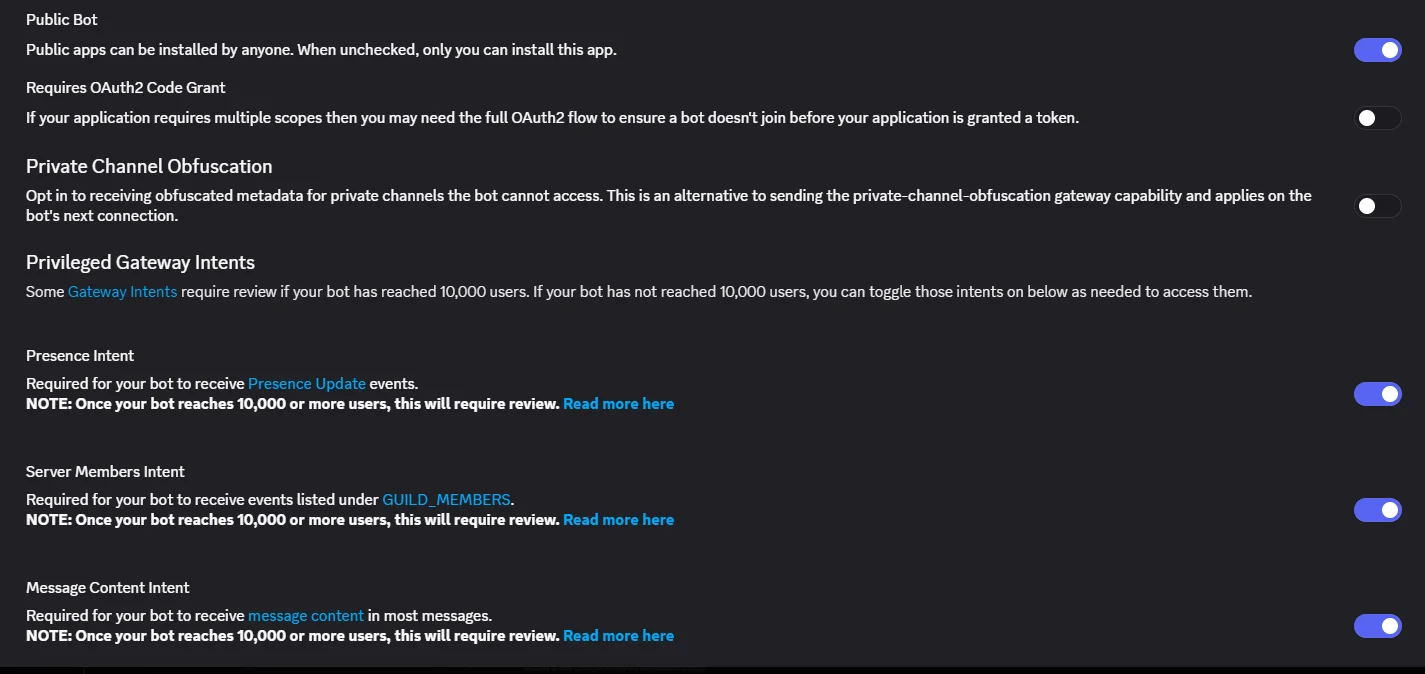
In the Bot tab, under Privileged Gateway Intents, turn on all three:
- Presence Intent
- Server Members Intent (needed to read members' roles)
- Message Content Intent
TIP
You can turn Public Bot off so that only you can add the bot to a server.
3. Bot permissions and invite
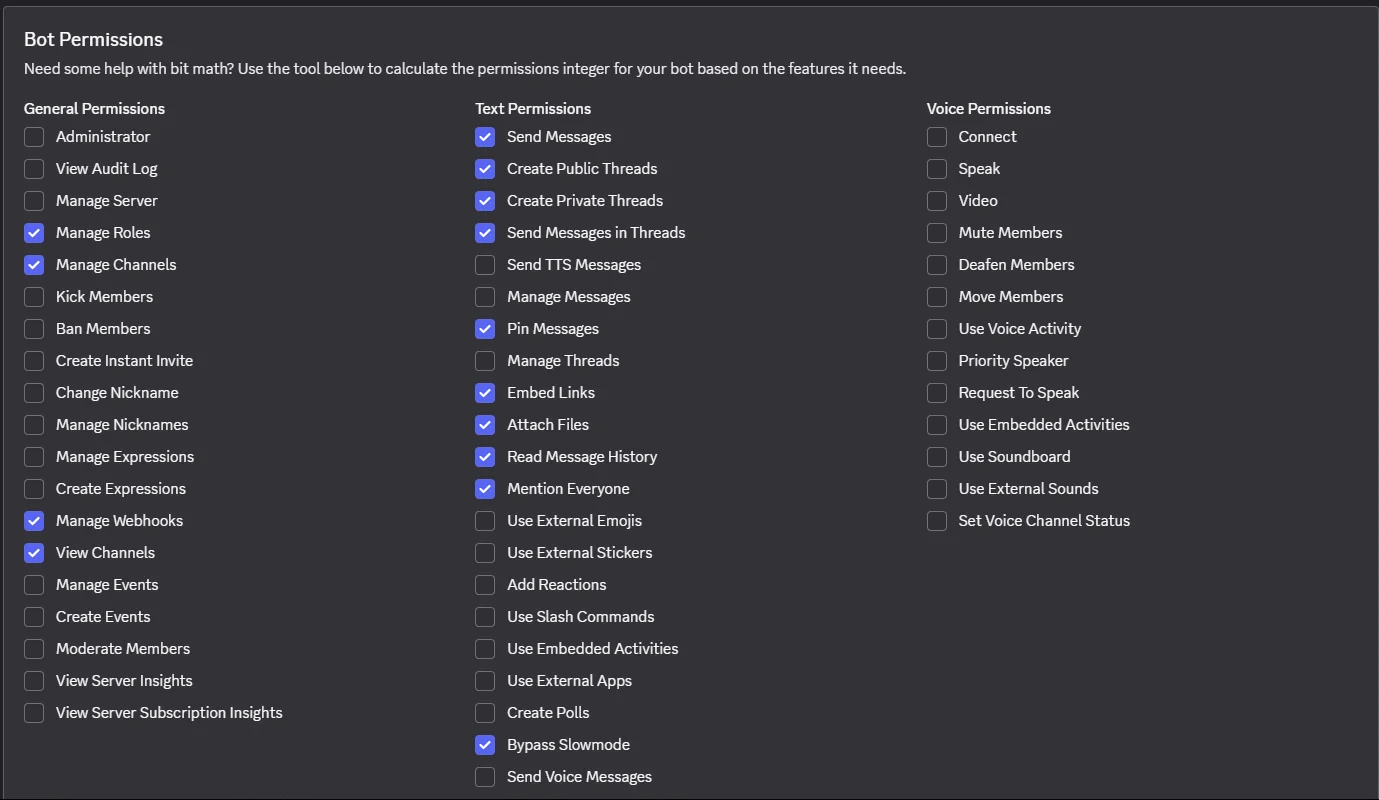
Open OAuth2 → URL Generator, tick the bot scope, then tick these permissions:
| General | Text |
|---|---|
| Manage Roles | Send Messages |
| Manage Channels | Create Public Threads |
| Manage Webhooks | Create Private Threads |
| View Channels | Send Messages in Threads |
| Pin Messages | |
| Embed Links | |
| Attach Files | |
| Read Message History | |
| Mention Everyone | |
| Bypass Slowmode |
Open the generated link and add the bot to your Discord server.
Role order
In your Discord server's Server Settings → Roles, drag the bot's role above every role it should give or remove (ban, warning and whitelist roles). Discord won't let a bot manage roles that are higher than its own.
4. Add the login redirect
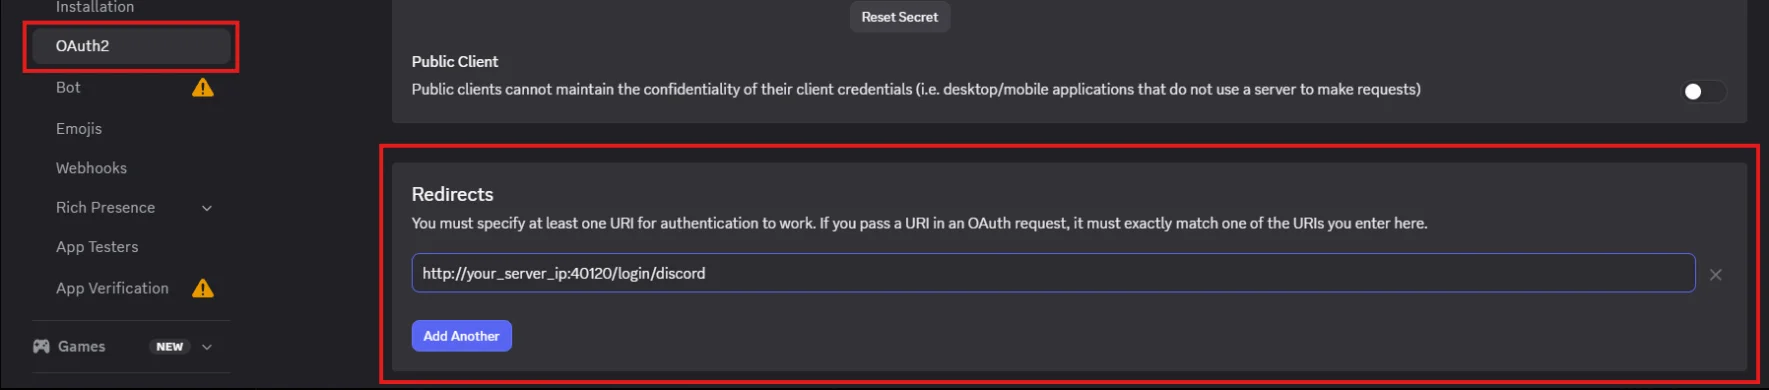
Open the OAuth2 tab. Under Redirects, add:
http://your_server_ip:40120/login/discordReplace your_server_ip with your server's public IP, then click Save Changes.
INFO
The redirect must match exactly, including http:// and the port. If you use a domain for txAdmin, use that domain instead of the IP.
5. Add the convars
Add these to server.cfg and replace the placeholder values:
setr txAdmin-discordRoleAuth true
setr txAdmin-discordRoleAuthOnly true
set txAdmin-discordGuildId "YOUR_GUILD_ID"
set txAdmin-discordBotToken "YOUR_BOT_TOKEN"
setr txAdmin-discordAdminRoles "ROLE_ID_1,ROLE_ID_2"
setr txAdmin-discordAdminPermissions "admin"
set txAdmin-menuActionWebhook "https://discord.com/api/webhooks/YOUR_WEBHOOK"
DANGER
Use set (not setr) for the bot token and webhook. They must never reach players.
6. Create roles with permissions
For different staff levels, create roles in the web panel:
- Go to Settings → Discord → Discord Auth Roles.
- Add a role, paste its Discord role ID, and tick its permissions.
- Enable Discord Role Web Auth and set your guild ID.
Players without a matching Discord role can't open the in-game menu.
You can also assign these roles to existing txAdmin accounts in Admins → Edit Admin → Roles.
Ban and warning roles
Give banned players a Discord role that stays while the ban is active:
set txAdmin-banRole "YOUR_BANNED_ROLE_ID"- While a ban is active, the member's whitelist roles are removed.
- The role is removed only when the ban expires or the player is unbanned.
- Leaving and rejoining Discord doesn't clear it.
Warnings use three strike roles (Settings → Discord → Ban Strike fields), or these convars:
set txAdmin-warnRole1 "ROLE_ID"
set txAdmin-warnRole2 "ROLE_ID"
set txAdmin-warnRole3 "ROLE_ID"
The first active warning gives Strike 1, the second Strike 2, and three or more Strike 3.